Seatti is a third-party application that anyone can add from the Teams App Store. To get it up and running, a Global Admin must grant the required permissions
(via links provided in the grey boxes in this article) and provide the Seatti Customer Success Team with the Tenant ID to connect to the Seatti server.
Please do not attempt to incorporate the app into an app registration process (e.g. granting permissions individually or in advance - all permissions will be requested by the app during the installation flow).
Seatti uses delegated permissions and acts exclusively on behalf of the user, never accessing data from the customer's tenant independently as an app.
Only if notifications shall be used, 1 app permission (TeamsActivity.Send) is needed.
Seatti does not work with pure on-premise setups.
Shortcuts to the sections in this install guide:

1. Prerequisites

2. Adding the app

3. Granting permissions

4. Applying restrictions

5. Pinning the app to the side bar in MS Teams

6. Updates
1. Prerequisites for installation
- Exchange directly in or at least synched to the cloud
- have your tenant ID at hand
- Admin with the respective permission rights
- A Global Admin can install Seatti from start to end - all within 10 min.
- An Application Admin can grant the permissions but might not be able to install Seatti from the MS Teams App Store, depending on your company's setup
-
- A Teams Admin can install the app from the MS Teams App Store, but doesn't have enough power to grant the permissions the app needs to run properly.
We recommend that a Global Admin performs all set-up steps at once and applies Setup and Permission Policies in MS Teams and Entra ID according to your company's requirements, so that only intended Seatti users can log in and see the app in MS Teams.
Here is an overview of which admin levels are required for the individual steps:
|
Required admin level per Installation Step |
Teams Admin |
|
Application Admin |
OR |
Global Admin |
|
Upload zip file to MS Teams |
✅ | ⛔ | ✅ | ||
|
Grant permissions |
⛔ | ✅ | ✅ | ||
|
Restrict access to Seatti
|
✅ ⛔ ✅ |
⛔ ✅ ✅ |
✅ ✅ ✅ ✅ |
2. Add Seatti as a Third Party App from the MS Teams App Store
- Go to Apps in MS Teams in the side bar
- Search for Seatti
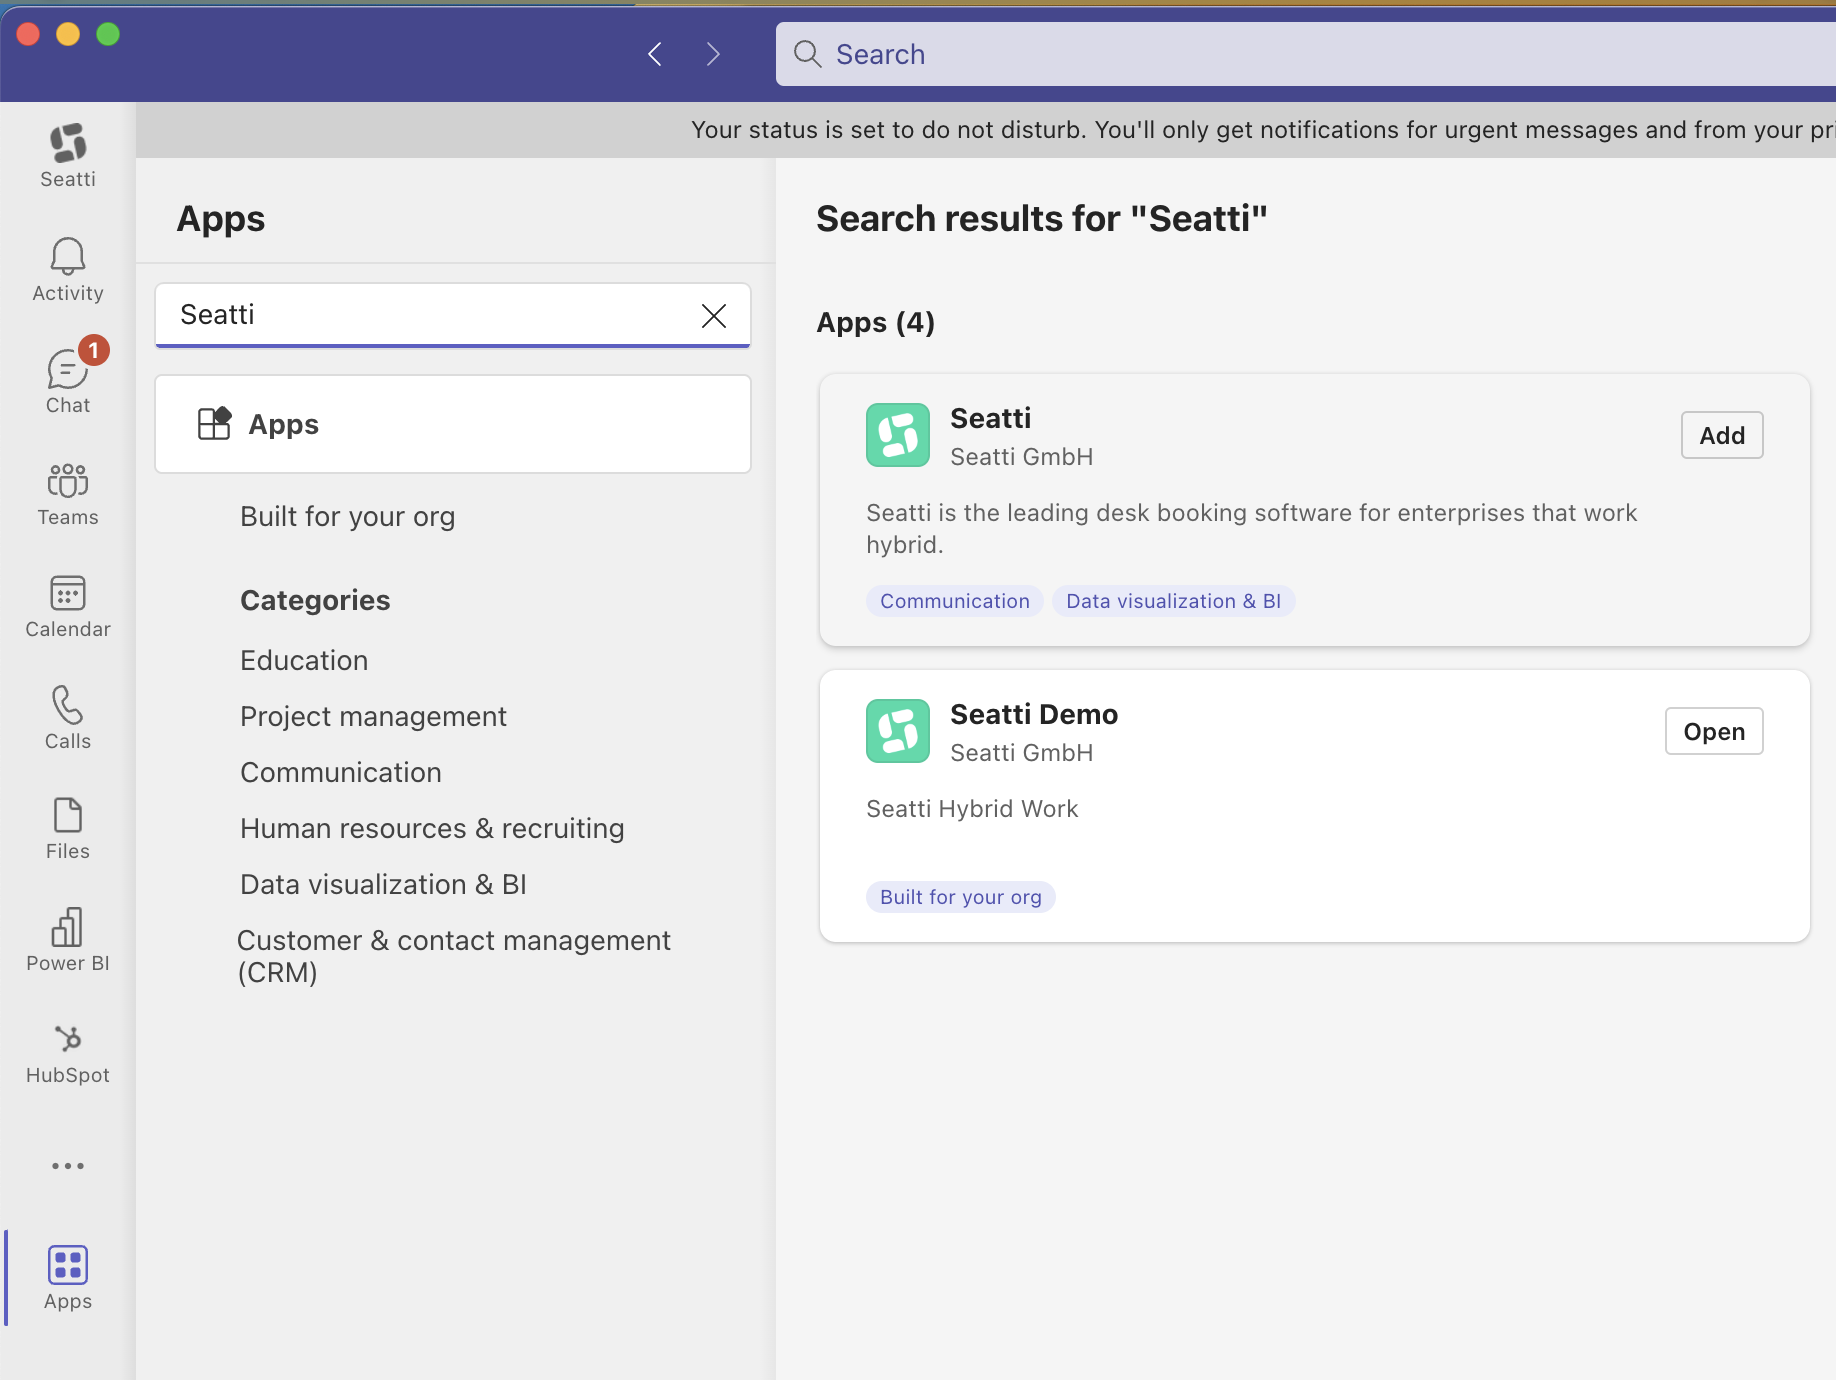
- Choose Seatti from Seatti GmbH with the blue Tags Communication und Data visualization & BI and click add
- Now go to Teams Admin Center via admin.teams.microsoft.com.
Seatti will now show up in the list of apps.
3. Grant consent to the app's required permissions
(Global or Application Admin needed)
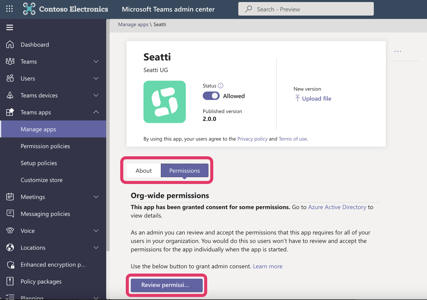
Granting permissions directly in the Teams Admin Center does not always work, unfortunately.
Teams being Teams.... 😉
We recommend to bypass this potential error by directly checking the permissions via the Entra ID Portal (former Azure AD).
When you add Seatti from the MS Teams App Store, you will be asked to grant permissions in 2 steps:
- First, the basic permissions like reading the profile must be granted on behalf of your organization.

If you check Entra ID now, you will see 4 basic permissions on the app.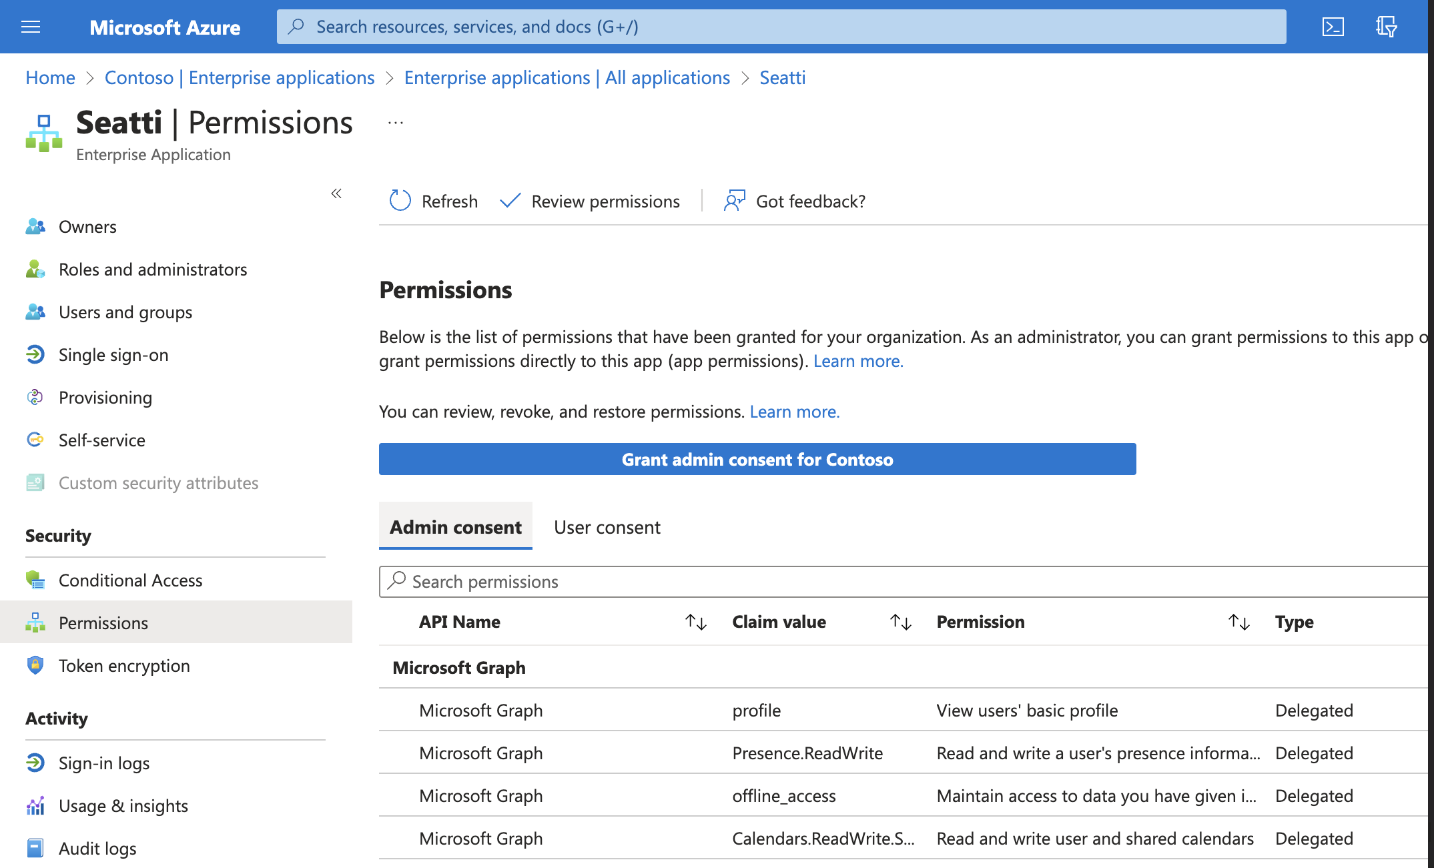
- You should automatically be redirected to consent to more permissions via this screen:
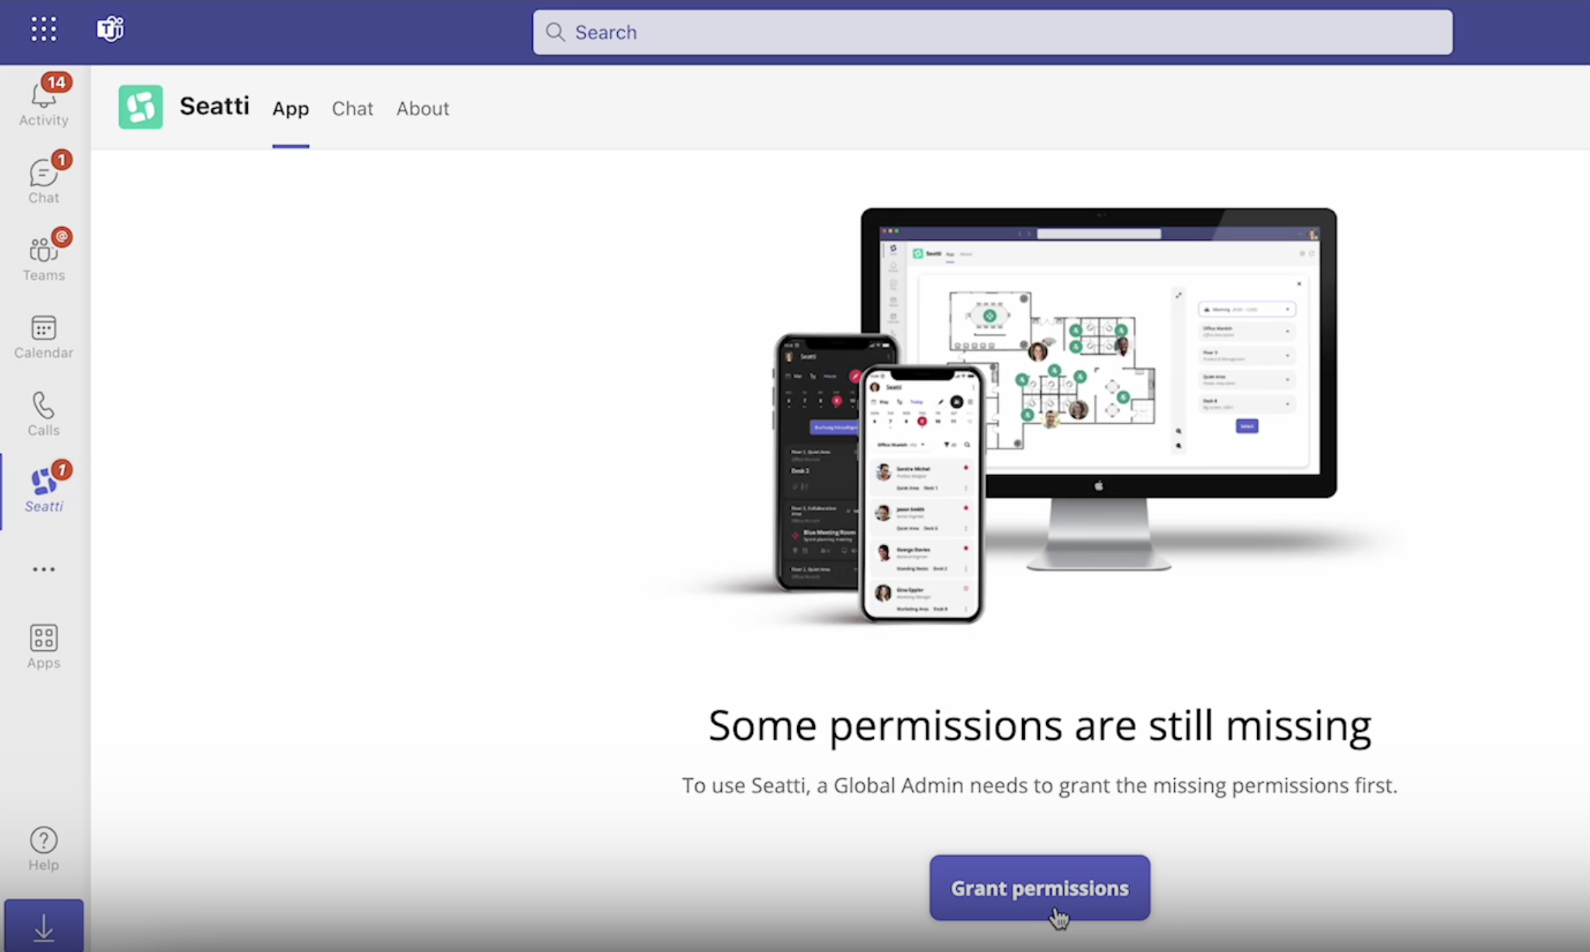 It will lead you to a second set of permissions to consent to.
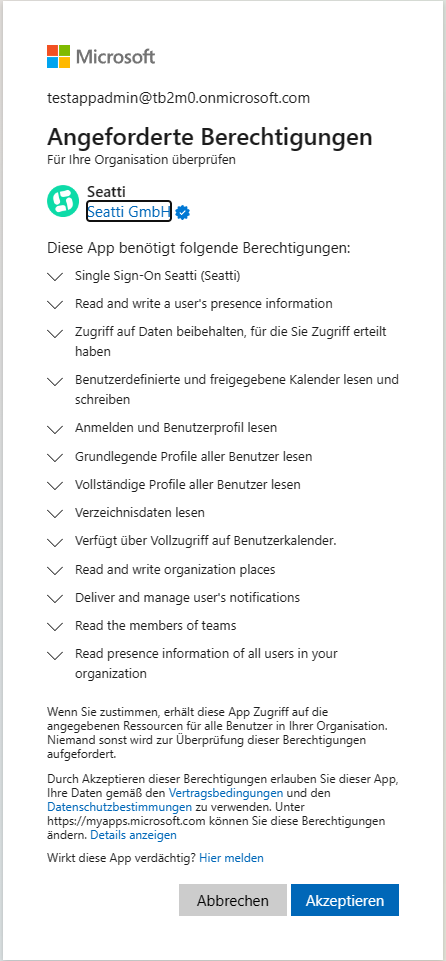
If not, you can also trigger this in Entra ID via the blue button "Grant admin consent for [your companyname]" and consent to the remaining permissions.
In the end, you should see the following 16 permissions for Seatti in Entra ID:
- 15 delegated permissions
- 1 app permission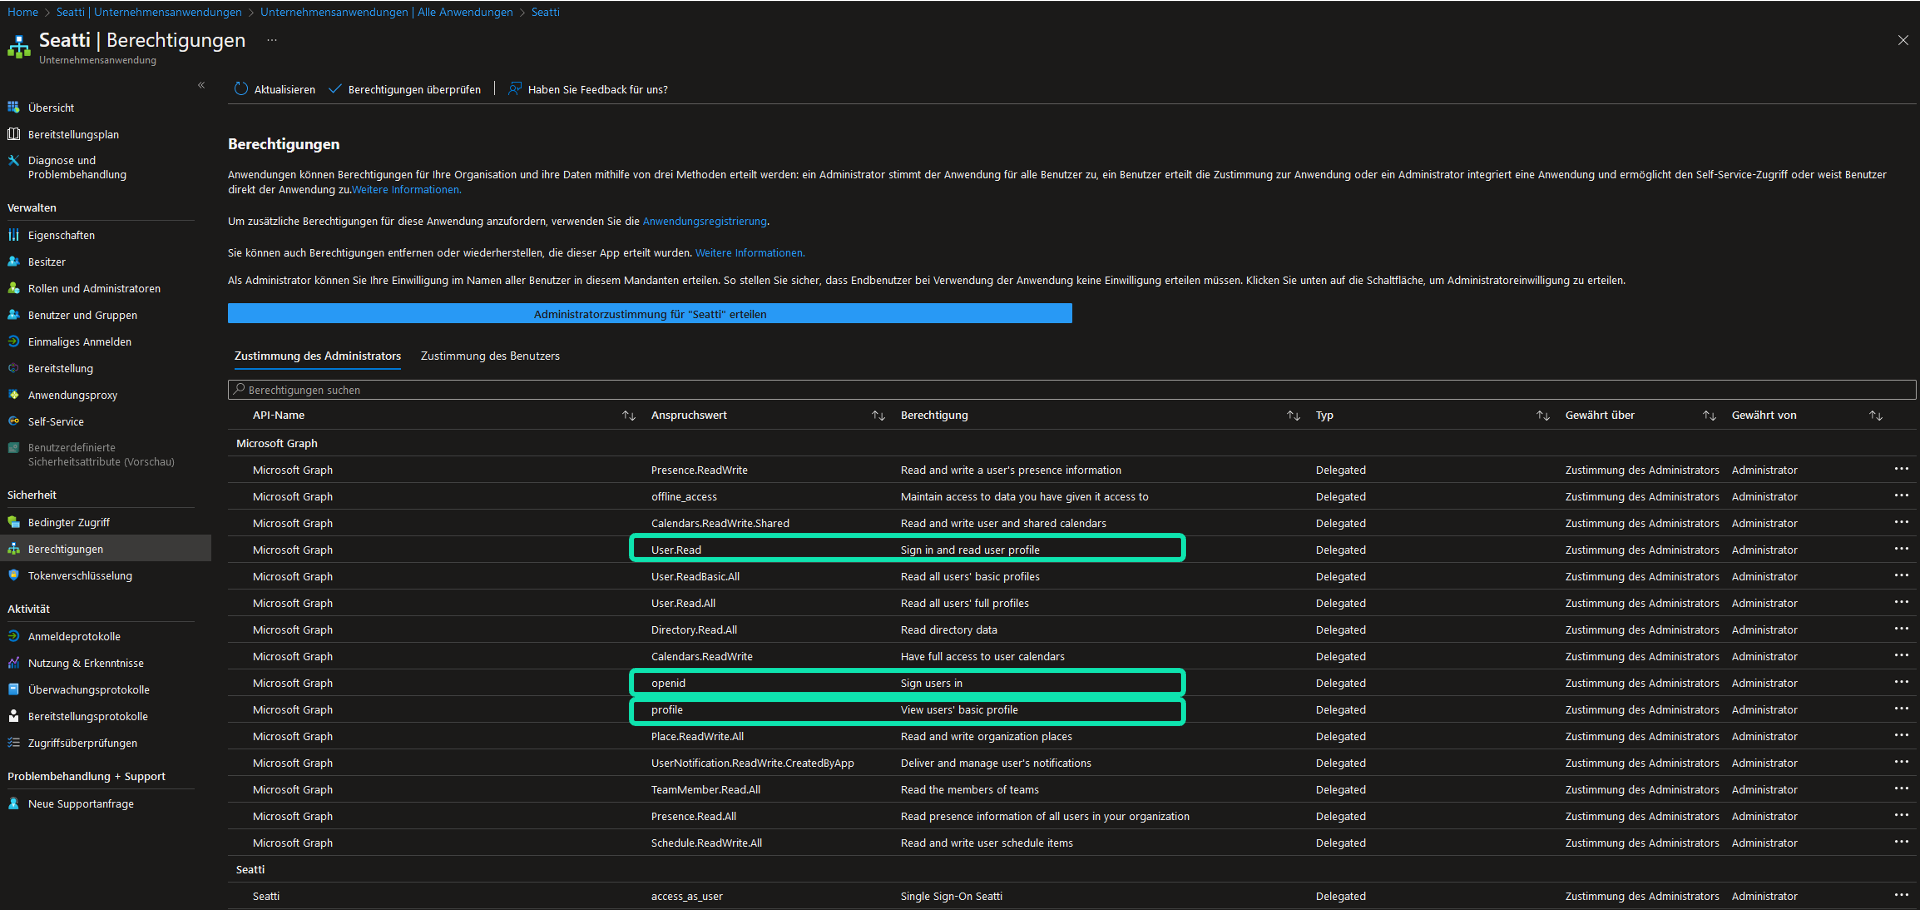
If the list is shorter or you encounter any other issues (e.g. when your admin accounts doesn't have a MS Teams license), please contact us a and we're happy to help you.
If single delegated permissions are not granted,
no user will be able to log in to Seatti.
4. Restrict Access to Seatti
Once the Seatti app is installed in your tenant, technically any user in your tenant could log in to Seatti and thereby consume a license. If you want to restrict license usage and/or access to Seatti to a limited number of employees, you have different options which you can use individually or combined).
There are 3 different types of restrictions:
- access to the app (restricting login / controlling license usage)
- visibility of the app (in MS Teams Store)
- booking restrictions (within the Seatti app)
- Access Restriction
You can assign a whitelist to the Seatti app in Entra ID and by this only allow members of the whitelist to authenticate at the Graph API (= login to Seatti with OAuth).
Someone who is not a member, will only see a bouncing Seatti logo when trying to log in but can not log in and will hence not use any license.
Here is a detailed description of how to implement a whitelist for Seatti in Azure AD.
Find further help with this guide: https://docs.microsoft.com/en-us/azure/active-directory/develop/howto-restrict-your-app-to-a-set-of-users - Visibility Restriction
You can restrict the visibility of the Seatti App inside your company by Teams policies. Doing so, only people with the respective policy assigned can find Seatti in the MS Teams App Store.
Simply setup an app policy (Setup Policy) for Third Party apps in the admin console of Microsoft Teams and whitelist or blacklist your users respectively. You can also apply a Permission Policy in MS Teams.
Find further help further with this guide: https://docs.microsoft.com/en-us/microsoftteams/teams-app-permission-policies - Booking Restriction
You can define if certain spaces (an area, e.g. Legal or HR) or resources (single desks) should be available for booking only to certain employees.
Access Groups are applied directly in the admin section within the Seatti app. The entry field queries security groups from within your tenant and lets you select one or more groups which you want to grant access to that space or resource. Note: You cannot add individual users, only groups as this allows for way easier maintenance. If new members are added to these groups or old ones removed, this immediately (after MS processed the group update) reflects in Seatti and doesn't need to be managed twice.
If you are not a member of a group that is allowed to book a restricted space, this space will not even be shown to you in the Planning section of Seatti, but you can still see colleagues that are allowed to book and where they booked in the Meetup-section.
Find detailed info on how Access Groups are implemented here.
5. Pinning the app to the task bar
You can pin Seatti to the side bar for every user so they don’t have to search the app in the App Store of MS Teams but it is immediately available for everyone.

- Go to teams.microsoft.com > Teams apps > Setup policies.
- Choose your Global Policy or any other policy
and add the Seatti App to the list in the section Pinned Apps. - If you want, move it to the top and save your settings.
This way, everyone has easy access to the Seatti App when they open MS Teams.
Find help with this guide:
https://docs.microsoft.com/en-us/microsoftteams/teams-app-setup-policies#pin-apps
6. Updates of Seatti
Updates run directly through the Third Party App. No to do for you as an admin.
Links to more detailed Microsoft Guides:
More Info on Third-Party-Apps (and how they differ from other types of apps in MS Teams)